Setting Up CUDA for Python on Ubuntu
- Introduction
- Getting Started with the Code
- Installing NVIDIA Drivers
- Setting Up a Python Environment
- Importing the Required Dependencies
- Setting Up the Project
- Converting RGB Images to Grayscale in Python
- Converting RGB Images to Grayscale in CUDA
- Conclusion
Introduction
This tutorial covers a convenient method for installing CUDA within a Python environment. CUDA (Compute Unified Device Architecture) is a parallel computing platform and programming model developed by NVIDIA for general computing on Graphics Processing Units (GPUs).
Installing CUDA directly within Python environments helps streamline working with projects that use custom CUDA kernels like GroundingDINO and creating custom kernels ourselves. Writing custom CUDA kernels can be beneficial when optimizing computational tasks for speed and efficiency, such as fusing operations in a PyTorch project.
The core steps and examples in this tutorial are from the following lecture by Jeremy Howard:
The tutorial covers each step, from installing NVIDIA graphics drivers in Ubuntu to verifying our CUDA installation by creating a custom kernel with PyTorch. While the provided steps for installing NVIDIA graphics drivers are specific to Ubuntu, the steps to install CUDA within Python environments should work for other Linux distros and WSL.
The Ubuntu website provides a step-by-step guide to installing Ubuntu on your PC, and you can install it alongside an existing operating system.
- Tutorial: Install Ubuntu with a Bootable USB Stick
Getting Started with the Code
The tutorial code is available as a Jupyter Notebook, which you can run locally or in a cloud-based environment like Google Colab, which provides free access to a CUDA-enabled GPU. I have dedicated tutorials for those new to these platforms or who need guidance setting up:
| Platform | Jupyter Notebook |
|---|---|
| Google Colab | Open In Colab |
| Linux | GitHub Repository |
Installing NVIDIA Drivers
We need to ensure we have NVIDIA GPU drivers installed before installing CUDA, so let’s first check if we already have them.
Check for Existing Drivers
Open a terminal window (Ctrl+Alt+T) and run the following command to see if you already have NVIDIA drivers installed:
cat /proc/driver/nvidia/versionSample output with NVIDIA drivers:
NVRM version: NVIDIA UNIX x86_64 Kernel Module  535.154.05  Thu Dec 28 15:37:48 UTC 2023
GCC version:  gcc version 12.3.0 (Ubuntu 12.3.0-1ubuntu1~22.04)
You can skip to the next section if you already have NVIDIA drivers.
You can run the following terminal commands to uninstall any existing NVIDIA and CUDA packages, if you want to start fresh:
- Press
Ctrl+Alt+Tto open a terminal window.
# Remove all installed NVIDIA packages
sudo apt-get remove --purge 'nvidia-.*' -y
# Remove all installed CUDA packages
sudo apt-get remove --purge 'cuda-.*' -y

# Clean up any remaining dependencies
sudo apt-get autoremove -y
sudo apt-get autoclean

# Update the initial RAM filesystem to ensure it doesn't include any NVIDIA drivers
sudo update-initramfs -u

# Reboot the system
sudo reboot
View available drivers
Ubuntu includes a convenient command-line tool for installing drivers. Open a terminal (Ctrl+Alt+T) and run the following command to see the available GPU drivers.
# Check the available drivers for your hardware
sudo ubuntu-drivers list
Here is the output on Ubuntu 22.04 with an RTX 40-series GPU:
$ sudo ubuntu-drivers list
nvidia-driver-545, (kernel modules provided by linux-modules-nvidia-545-generic-hwe-22.04)
nvidia-driver-535-open, (kernel modules provided by linux-modules-nvidia-535-open-generic-hwe-22.04)
nvidia-driver-545-open, (kernel modules provided by linux-modules-nvidia-545-open-generic-hwe-22.04)
nvidia-driver-525, (kernel modules provided by linux-modules-nvidia-525-generic-hwe-22.04)
nvidia-driver-535-server-open, (kernel modules provided by linux-modules-nvidia-535-server-open-generic-hwe-22.04)
nvidia-driver-535-server, (kernel modules provided by linux-modules-nvidia-535-server-generic-hwe-22.04)
nvidia-driver-525-open, (kernel modules provided by linux-modules-nvidia-525-open-generic-hwe-22.04)
nvidia-driver-535, (kernel modules provided by linux-modules-nvidia-535-generic-hwe-22.04)
nvidia-driver-525-server, (kernel modules provided by linux-modules-nvidia-525-server-generic-hwe-22.04)
Install the Drivers
Next, we run the install command where we can stick with the default driver version or manually specify one.
# Install the driver that is considered the best match for your hardware
sudo ubuntu-drivers install
# Install driver version 535
sudo ubuntu-drivers install nvidia:535After that, we need to reboot the computer.
# Reboot the system
sudo reboot
Once back in Ubuntu, we can create a Python environment and install CUDA.
Setting Up a Python Environment
We will use the Mamba package manager to create the Python environment. You can learn more about it in my getting started tutorial. Feel free to use Conda instead of Mamba if you already have that installed.
Install Mamba Package Manager
The following bash commands will download the latest release, install it, and relaunch the current bash shell to apply the relevant changes:
# Download the latest Miniforge3 installer for the current OS and architecture
wget "https://github.com/conda-forge/miniforge/releases/latest/download/Miniforge3-$(uname)-$(uname -m).sh"

# Run the Miniforge3 installer silently (-b flag for batch mode)
bash Miniforge3-$(uname)-$(uname -m).sh -b

# Initialize mamba for shell usage
~/miniforge3/bin/mamba init

# Restart the shell to apply changes
bash
Create a Python Environment
Next, we’ll create a Python environment and activate it.
mamba create --name cuda-env python=3.11 -y
mamba activate cuda-env
conda create --name cuda-env python=3.11 -y
conda activate cuda-envInstall CUDA Package
We will later use PyTorch to verify our CUDA installation, so let’s ensure we install the appropriate CUDA version. You can use the link below to check the latest CUDA version supported by PyTorch. At the time of writing, that was CUDA version 12.1.
Run the following command to install CUDA in our Python environment with Conda/Mamba.
mamba install cuda -c nvidia/label/cuda-12.1.0 -yconda install cuda -c nvidia/label/cuda-12.1.0 -yThe command installs CUDA into our cuda-env environment’s root directory.
$ find $CONDA_PREFIX/include -name cuda
/home/innom-dt/mambaforge/envs/cuda-env/include/thrust/system/cuda
/home/innom-dt/mambaforge/envs/cuda-env/include/cuda
Install PyTorch
Run the following command to install PyTorch with CUDA version 12.1.
# Install PyTorch with CUDA
mamba install pytorch torchvision torchaudio pytorch-cuda=12.1 -c pytorch -c nvidia/label/cuda-12.1.0 -y
# Install PyTorch with CUDA
conda install pytorch torchvision torchaudio pytorch-cuda=12.1 -c pytorch -c nvidia/label/cuda-12.1.0 -yInstall additional dependencies
We also need to install some additional libraries for our test code.
| Package | Description |
|---|---|
jupyter |
An open-source web application that allows you to create and share documents that contain live code, equations, visualizations, and narrative text. (link) |
ninja |
Ninja is a small build system with a focus on speed. (link) |
pandas |
This package provides fast, powerful, and flexible data analysis and manipulation tools. (link) |
pillow |
The Python Imaging Library adds image processing capabilities. (link) |
wurlitzer |
Capture C-level output in context managers. (link) |
Run the following commands to install these additional libraries:
pip install jupyter ninja pandas pillow wurlitzerWith our environment set up, we can open our Jupyter Notebook and dive into the code.
Importing the Required Dependencies
First, we will import the necessary Python modules into our Jupyter Notebook and verify that PyTorch can find our CUDA installation.
# Import Python Standard Library dependencies
import os, math, gzip, pickle
from urllib.request import urlretrieve
from pathlib import Path

# Import the pandas package
import pandas as pd

# Do not truncate the contents of cells and display all rows and columns
pd.set_option('max_colwidth', None, 'display.max_rows', None, 'display.max_columns', None)

# Import PIL for image manipulation
from PIL import Image

# Import PyTorch dependencies
import torch
from torch import tensor
import torchvision as tv
import torchvision.transforms.functional as tvf
from torchvision import io
from torch.utils.cpp_extension import load_inline, CUDA_HOME

# Verify the CUDA install path
print(CUDA_HOME)/home/innom-dt/mambaforge/envs/cuda-envWe can tell from the above print statement that PyTorch correctly detected the path for our Python environment’s CUDA install.
Setting Up the Project
In this section, we set up some basics for our project, such as enabling the capture of C/C++ output in the notebook and making CUDA operations synchronous for easier debugging.
Capture C++ Output
# Enable capture of C/C++ output in the notebook cells.
%load_ext wurlitzer
Make CUDA Operations Synchronous
# Set environment variable to make CUDA operations synchronous for easier debugging
os.environ['CUDA_LAUNCH_BLOCKING']='1'
Converting RGB Images to Grayscale in Python
To gauge the performance of CUDA over standard Python, we will convert an RGB image to grayscale.
Download a Test Image
We can download a copy of Vincent van Gogh’s The Starry Night painting from Wikimedia Commons for our test image.
# Define the URL of the test image
test_img_url = 'https://upload.wikimedia.org/wikipedia/commons/thumb/e/ea/Van_Gogh_-_Starry_Night_-_Google_Art_Project.jpg/1280px-Van_Gogh_-_Starry_Night_-_Google_Art_Project.jpg'

# Extract the file name from the URL
test_img_name = Path(test_img_url).name

# Create a Path object for the image file
img_path = Path(test_img_name)

# Check if the image file does not exist in the local directory
if not img_path.exists():
    # If the file does not exist, download it from the URL to the local directory
    urlretrieve(test_img_url, img_path)
Load the Test Image
Once downloaded, we will load the image as an RGB tensor.
# Load the test image as an RGB tensor
img_tensor = io.read_image(str(img_path))
print(img_tensor.shape)

# Resize the image tensor
resized_img_tensor = tvf.resize(img_tensor, 512, antialias=True)
print(resized_img_tensor.shape)

# Visualize the tensor as a PIL image
Image.fromarray(resized_img_tensor.permute(1, 2, 0).numpy())
torch.Size([3, 1014, 1280])
torch.Size([3, 512, 646])
Baseline Python Implementation
Next, we will define a function that uses a standard for-loop to iterate through the RGB pixel values to create a new grayscale tensor.
Define a function to convert an RGB Tensor to Grayscale
def rgb2gray_py(rgb_tensor, gray_coeffs=[0.2989, 0.5870, 0.1140]):
    # Extract the channel (c), height (h), and width (w) dimensions of the input image tensor
    c, h, w = rgb_tensor.shape
    # Calculate the total number of pixels in the image (height * width)
    n = h * w
    # Flatten the input image tensor from CxHxW format to a long array to simplify processing
    rgb_tensor = rgb_tensor.flatten()
    # Create an empty tensor 'res' to hold the grayscale values, with the same datatype and device as the input
    res = torch.empty(n, dtype=rgb_tensor.dtype, device=rgb_tensor.device)

    # Loop through each pixel to compute the grayscale value
    for i in range(n):
        # Apply the grayscale conversion formula: 0.2989 * Red + 0.5870 * Green + 0.1140 * Blue
        res[i] = gray_coeffs[0] * rgb_tensor[i] + gray_coeffs[1] * rgb_tensor[i+n] + gray_coeffs[2] * rgb_tensor[i+2*n]

    # Reshape the resulting flat grayscale values back into a 2D image (height x width)
    return res.view(h, w)
Time the Python implementation
We can use the IPython magic command %%time to gauge the performance of our Python implementation.
%%time
img_gray_tensor = rgb2gray_py(resized_img_tensor)
print(img_gray_tensor.shape)
torch.Size([512, 646])
CPU times: user 6.53 s, sys: 0 ns, total: 6.53 s
Wall time: 6.53 sOn my system’s i7-11700K CPU, it takes nearly seven seconds to iterate through all the pixels in the 512x646 image.
Verify the Result
# Visualize the result as a PIL grayscale image
Image.fromarray(img_gray_tensor.numpy(), mode='L')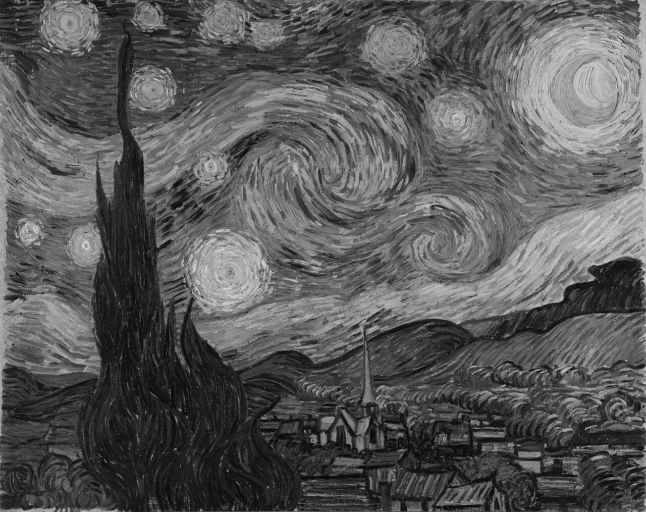
With our baseline established, let’s make an equivalent CUDA implementation to leverage the parallel processing capabilities of a GPU.
Converting RGB Images to Grayscale in CUDA
We can use PyTorch’s load_inline function to build a custom CUDA kernel and load it as a PyTorch extension. The function takes the CUDA code as a Python string and automatically compiles it.
Streaming Multiprocessors (SMs):
- SMs are the fundamental execution units in NVIDIA GPUs.
- Each one can execute multiple threads concurrently.
Thread Blocks:
- A thread block is a group of threads that can cooperate through shared memory and synchronization.
- All threads in a block run on the same SM, meaning they can share resources such as shared memory and can synchronize their execution with each other.
2^31max blocks for dim0,2^16max for dims1&21024max threads per block (use a multiple of32)
Concurrency:
- In CUDA, all threads in a block have the potential to run concurrently.
- The actual concurrency depends on the number of CUDA cores per SM and the resources required by the threads.
Define the CUDA Code
We will define the CUDA code in sections.
Define the utility includes and definitions for PyTorch and CUDA
Let’s start by adding the required header files and macros. The following code adds the headers for the PyTorch extension library and CUDA-specific exceptions for error handling.
It also defines a few macros to check if a tensor is on a CUDA device and if the tensor is contiguous in memory.
Lastly, it defines a function to calculate the ceiling of an integer division. We use this later for calculating how to split work on the GPU.
// Include the necessary headers for PyTorch and CUDA functionality.
#include <torch/extension.h> // PyTorch extension library for custom C++ and CUDA extensions.
#include <stdio.h> // Standard I/O for debugging (e.g., printf).
#include <c10/cuda/CUDAException.h> // CUDA-specific exceptions for error handling.

// Macro to check if a tensor is allocated on a CUDA device.
// If not, it throws an error.
// x: The tensor to check.
#define CHECK_CUDA(x) TORCH_CHECK(x.device().is_cuda(), #x " must be a CUDA tensor")

// Macro to check if a tensor is contiguous in memory.
// If not, it throws an error.
// Contiguous tensors are often required for efficient CUDA operations.
// x: The tensor to check.
#define CHECK_CONTIGUOUS(x) TORCH_CHECK(x.is_contiguous(), #x " must be contiguous")

// Macro to perform both CUDA and contiguity checks on a tensor.
// This is a convenience macro to ensure a tensor is suitable for CUDA operations.
#define CHECK_INPUT(x) CHECK_CUDA(x); CHECK_CONTIGUOUS(x)

// Function to calculate the ceiling of an integer division.
// This is often used to determine the number of blocks needed in a CUDA kernel launch
// when the total number of threads does not evenly divide by the number of threads per block.
// a: The numerator in the division.
// b: The denominator in the division.
// Returns: The smallest integer greater than or equal to a/b.
inline unsigned int cdiv(unsigned int a, unsigned int b) {
    return (a + b - 1) / b;
}
cuda_utils_macros = r'''
// Include the necessary headers for PyTorch and CUDA functionality.
#include <torch/extension.h> // PyTorch extension library for custom C++ and CUDA extensions.
#include <stdio.h> // Standard I/O for debugging (e.g., printf).
#include <c10/cuda/CUDAException.h> // CUDA-specific exceptions for error handling.
// Macro to check if a tensor is allocated on a CUDA device.
// If not, it throws an error.
// x: The tensor to check.
#define CHECK_CUDA(x) TORCH_CHECK(x.device().is_cuda(), #x " must be a CUDA tensor")
// Macro to check if a tensor is contiguous in memory.
// If not, it throws an error.
// Contiguous tensors are often required for efficient CUDA operations.
// x: The tensor to check.
#define CHECK_CONTIGUOUS(x) TORCH_CHECK(x.is_contiguous(), #x " must be contiguous")
// Macro to perform both CUDA and contiguity checks on a tensor.
// This is a convenience macro to ensure a tensor is suitable for CUDA operations.
#define CHECK_INPUT(x) CHECK_CUDA(x); CHECK_CONTIGUOUS(x)
// Function to calculate the ceiling of an integer division.
// This is often used to determine the number of blocks needed in a CUDA kernel launch
// when the total number of threads does not evenly divide by the number of threads per block.
// a: The numerator in the division.
// b: The denominator in the division.
// Returns: The smallest integer greater than or equal to a/b.
inline unsigned int cdiv(unsigned int a, unsigned int b) {
return (a + b - 1) / b;
}
'''Define the CUDA kernel for RGB to Grayscale conversion
Next, we define the CUDA kernel for converting RGB tensors to grayscale. The kernel takes pointers to the memory locations for the input RGB and output grayscale tensors, along with the total number of pixels.
Instead of iterating through each pixel, the kernel applies the grayscale conversion formula to each pixel in parallel.
// CUDA kernel to convert an RGB image to grayscale.
// Inputs:
// - x: Pointer to the input image data in RGB format.
// - out: Pointer to the output image data in grayscale.
// - n: The total number of pixels in the image.
__global__ void rgb_to_grayscale_kernel(unsigned char* x, unsigned char* out, int n) {
    // Calculate the global thread index.
    int i = blockIdx.x * blockDim.x + threadIdx.x;

    // Ensure the thread index is within the bounds of the image data.
    if (i < n) {
        // Convert the RGB values to grayscale using the luminosity method.
        // The luminosity method is a weighted sum of the R, G, and B values.
        // Weights: 0.2989 for Red, 0.5870 for Green, and 0.1140 for Blue.
        out[i] = 0.2989 * x[i] + 0.5870 * x[i + n] + 0.1140 * x[i + 2 * n];
    }
}
cuda_kernel = r'''
// CUDA kernel to convert an RGB image to grayscale.
// Inputs:
// - x: Pointer to the input image data in RGB format.
// - out: Pointer to the output image data in grayscale.
// - n: The total number of pixels in the image.
__global__ void rgb_to_grayscale_kernel(unsigned char* x, unsigned char* out, int n) {
// Calculate the global thread index.
int i = blockIdx.x * blockDim.x + threadIdx.x;
// Ensure the thread index is within the bounds of the image data.
if (i < n) {
// Convert the RGB values to grayscale using the luminosity method.
// The luminosity method is a weighted sum of the R, G, and B values.
// Weights: 0.2989 for Red, 0.5870 for Green, and 0.1140 for Blue.
out[i] = 0.2989 * x[i] + 0.5870 * x[i + n] + 0.1140 * x[i + 2 * n];
}
}
'''The __global__ qualifier keyword indicates the kernel will be callable from the CPU or GPU and run on the GPU.
Define the PyTorch function to convert RGB to Grayscale
Last, we must define a PyTorch function to use the custom CUDA kernel within Python.
The function will take an RGB tensor as input, initialize the output grayscale tensor, launch the CUDA kernel, and return the updated grayscale tensor.
We need to specify how to divide the work for the list or pixel values among thread blocks on the GPU. For our function, we will set each block to have 256 threads and then use the number of pixels to determine how many blocks we need.
// Function to convert a PyTorch tensor representing an RGB image to grayscale.
// Input:
// - input: A PyTorch tensor of the input RGB image.
// Output:
// - A PyTorch tensor of the output grayscale image.
torch::Tensor rgb_to_grayscale(torch::Tensor input) {
    // Perform CUDA and contiguity checks
    CHECK_INPUT(input);

    // Extract the height and width from the input tensor's dimensions.
    int h = input.size(1);
    int w = input.size(2);
    printf("\nh*w: %d*%d\n", h, w); // Debug print statement for dimensions.

    // Create an empty output tensor with the same dimensions as the input.
    auto output = torch::empty({h, w}, input.options());

    // Define the number of threads per block.
    int threads = 256;

    // Calculate the number of blocks needed for the conversion, ensuring
    // we have enough blocks to cover all pixels.
    // Launch the CUDA kernel with calculated dimensions.
    rgb_to_grayscale_kernel<<<cdiv(w*h, threads), threads>>>(
        input.data_ptr<unsigned char>(), output.data_ptr<unsigned char>(), w*h);

    // Check for any errors during kernel launch or execution.
    C10_CUDA_KERNEL_LAUNCH_CHECK();

    // Return the output tensor.
    return output;
}
pytorch_function = r'''
// Function to convert a PyTorch tensor representing an RGB image to grayscale.
// Input:
// - input: A PyTorch tensor of the input RGB image.
// Output:
// - A PyTorch tensor of the output grayscale image.
torch::Tensor rgb_to_grayscale(torch::Tensor input) {
// Perform CUDA and contiguity checks
CHECK_INPUT(input);
// Extract the height and width from the input tensor's dimensions.
int h = input.size(1);
int w = input.size(2);
printf("\nh*w: %d*%d\n", h, w); // Debug print statement for dimensions.
// Create an empty output tensor with the same dimensions as the input.
auto output = torch::empty({h, w}, input.options());
// Define the number of threads per block.
int threads = 256;
// Calculate the number of blocks needed for the conversion, ensuring
// we have enough blocks to cover all pixels.
// Launch the CUDA kernel with calculated dimensions.
rgb_to_grayscale_kernel<<<cdiv(w*h, threads), threads>>>(
input.data_ptr<unsigned char>(), output.data_ptr<unsigned char>(), w*h);
// Check for any errors during kernel launch or execution.
C10_CUDA_KERNEL_LAUNCH_CHECK();
// Return the output tensor.
return output;
}
'''Build the PyTorch Extension
With the code for our CUDA file defined, we can pass it to the load_inline function to compile it.
# Combine the CUDA source code
cuda_src = cuda_utils_macros + cuda_kernel + pytorch_function
# Define the C++ source code
cpp_src = "torch::Tensor rgb_to_grayscale(torch::Tensor input);"

# A flag indicating whether to use optimization flags for CUDA compilation.
opt=False

# Compile and load the CUDA and C++ sources as an inline PyTorch extension
module = load_inline(
    cuda_sources=[cuda_src],                  # List of CUDA source code strings.
    cpp_sources=[cpp_src],                    # List of C++ source code strings.
    functions=['rgb_to_grayscale'],           # List of function names to be included in the extension.
    extra_cuda_cflags=["-O2"] if opt else [], # Enable optimization flags if `opt` is True.
    verbose=True,                             # Enable verbose output if `verbose` is True.
    name="inline_ext"                         # Name of the generated extension module.
)
Using /home/innom-dt/.cache/torch_extensions/py311_cu121 as PyTorch extensions root...
Detected CUDA files, patching ldflags
Emitting ninja build file /home/innom-dt/.cache/torch_extensions/py311_cu121/inline_ext/build.ninja...
Building extension module inline_ext...
Allowing ninja to set a default number of workers... (overridable by setting the environment variable MAX_JOBS=N)
[1/3] c++ -MMD -MF main.o.d -DTORCH_EXTENSION_NAME=inline_ext -DTORCH_API_INCLUDE_EXTENSION_H -DPYBIND11_COMPILER_TYPE=\"_gcc\" -DPYBIND11_STDLIB=\"_libstdcpp\" -DPYBIND11_BUILD_ABI=\"_cxxabi1011\" -isystem /home/innom-dt/mambaforge/envs/cuda-env/lib/python3.11/site-packages/torch/include -isystem /home/innom-dt/mambaforge/envs/cuda-env/lib/python3.11/site-packages/torch/include/torch/csrc/api/include -isystem /home/innom-dt/mambaforge/envs/cuda-env/lib/python3.11/site-packages/torch/include/TH -isystem /home/innom-dt/mambaforge/envs/cuda-env/lib/python3.11/site-packages/torch/include/THC -isystem /home/innom-dt/mambaforge/envs/cuda-env/include -isystem /home/innom-dt/mambaforge/envs/cuda-env/include/python3.11 -D_GLIBCXX_USE_CXX11_ABI=0 -fPIC -std=c++17 -c /home/innom-dt/.cache/torch_extensions/py311_cu121/inline_ext/main.cpp -o main.o
[2/3] /home/innom-dt/mambaforge/envs/cuda-env/bin/nvcc --generate-dependencies-with-compile --dependency-output cuda.cuda.o.d -DTORCH_EXTENSION_NAME=inline_ext -DTORCH_API_INCLUDE_EXTENSION_H -DPYBIND11_COMPILER_TYPE=\"_gcc\" -DPYBIND11_STDLIB=\"_libstdcpp\" -DPYBIND11_BUILD_ABI=\"_cxxabi1011\" -isystem /home/innom-dt/mambaforge/envs/cuda-env/lib/python3.11/site-packages/torch/include -isystem /home/innom-dt/mambaforge/envs/cuda-env/lib/python3.11/site-packages/torch/include/torch/csrc/api/include -isystem /home/innom-dt/mambaforge/envs/cuda-env/lib/python3.11/site-packages/torch/include/TH -isystem /home/innom-dt/mambaforge/envs/cuda-env/lib/python3.11/site-packages/torch/include/THC -isystem /home/innom-dt/mambaforge/envs/cuda-env/include -isystem /home/innom-dt/mambaforge/envs/cuda-env/include/python3.11 -D_GLIBCXX_USE_CXX11_ABI=0 -D__CUDA_NO_HALF_OPERATORS__ -D__CUDA_NO_HALF_CONVERSIONS__ -D__CUDA_NO_BFLOAT16_CONVERSIONS__ -D__CUDA_NO_HALF2_OPERATORS__ --expt-relaxed-constexpr -gencode=arch=compute_89,code=compute_89 -gencode=arch=compute_89,code=sm_89 --compiler-options '-fPIC' -std=c++17 -c /home/innom-dt/.cache/torch_extensions/py311_cu121/inline_ext/cuda.cu -o cuda.cuda.o
[3/3] c++ main.o cuda.cuda.o -shared -L/home/innom-dt/mambaforge/envs/cuda-env/lib/python3.11/site-packages/torch/lib -lc10 -lc10_cuda -ltorch_cpu -ltorch_cuda -ltorch -ltorch_python -L/home/innom-dt/mambaforge/envs/cuda-env/lib -lcudart -o inline_ext.so
Loading extension module inline_ext...Getting Information About the Module
With our PyTorch extension loaded as a Python module, we can get the path to the module and explore the files created during the build process.
Get the module path
# Print the path to the extension module
print(f"Module Path: {module.__file__}")
Module Path: /home/innom-dt/.cache/torch_extensions/py311_cu121/inline_ext/inline_ext.soGet the module content
# Print the content of the module folder as a Pandas DataFrame
pd.DataFrame(Path(module.__file__).parent.iterdir())| 0 | |
|---|---|
| 0 | /home/innom-dt/.cache/torch_extensions/py311_cu121/inline_ext/inline_ext.so |
| 1 | /home/innom-dt/.cache/torch_extensions/py311_cu121/inline_ext/cuda.cu |
| 2 | /home/innom-dt/.cache/torch_extensions/py311_cu121/inline_ext/.ninja_deps |
| 3 | /home/innom-dt/.cache/torch_extensions/py311_cu121/inline_ext/main.cpp |
| 4 | /home/innom-dt/.cache/torch_extensions/py311_cu121/inline_ext/build.ninja |
| 5 | /home/innom-dt/.cache/torch_extensions/py311_cu121/inline_ext/.ninja_log |
| 6 | /home/innom-dt/.cache/torch_extensions/py311_cu121/inline_ext/main.o |
| 7 | /home/innom-dt/.cache/torch_extensions/py311_cu121/inline_ext/cuda.cuda.o |
If we open the cuda.cu file, we can see the code we fed the load_inline function:
#include <torch/types.h>
#include <cuda.h>
#include <cuda_runtime.h>

// Include the necessary headers for PyTorch and CUDA functionality.
#include <torch/extension.h> // PyTorch extension library for custom C++ and CUDA extensions.
#include <stdio.h> // Standard I/O for debugging (e.g., printf).
#include <c10/cuda/CUDAException.h> // CUDA-specific exceptions for error handling.

// Macro to check if a tensor is allocated on a CUDA device.
// If not, it throws an error.
// x: The tensor to check.
#define CHECK_CUDA(x) TORCH_CHECK(x.device().is_cuda(), #x " must be a CUDA tensor")

// Macro to check if a tensor is contiguous in memory.
// If not, it throws an error.
// Contiguous tensors are often required for efficient CUDA operations.
// x: The tensor to check.
#define CHECK_CONTIGUOUS(x) TORCH_CHECK(x.is_contiguous(), #x " must be contiguous")

// Macro to perform both CUDA and contiguity checks on a tensor.
// This is a convenience macro to ensure a tensor is suitable for CUDA operations.
#define CHECK_INPUT(x) CHECK_CUDA(x); CHECK_CONTIGUOUS(x)

// Function to calculate the ceiling of an integer division.
// This is often used to determine the number of blocks needed in a CUDA kernel launch
// when the total number of threads does not evenly divide by the number of threads per block.
// a: The numerator in the division.
// b: The denominator in the division.
// Returns: The smallest integer greater than or equal to a/b.
inline unsigned int cdiv(unsigned int a, unsigned int b) {
    return (a + b - 1) / b;
}

// CUDA kernel to convert an RGB image to grayscale.
// Inputs:
// - x: Pointer to the input image data in RGB format.
// - out: Pointer to the output image data in grayscale.
// - n: The total number of pixels in the image.
__global__ void rgb_to_grayscale_kernel(unsigned char* x, unsigned char* out, int n) {
    // Calculate the global thread index.
    int i = blockIdx.x * blockDim.x + threadIdx.x;

    // Ensure the thread index is within the bounds of the image data.
    if (i < n) {
        // Convert the RGB values to grayscale using the luminosity method.
        // The luminosity method is a weighted sum of the R, G, and B values.
        // Weights: 0.2989 for Red, 0.5870 for Green, and 0.1140 for Blue.
        out[i] = 0.2989 * x[i] + 0.5870 * x[i + n] + 0.1140 * x[i + 2 * n];
    }
}

// Function to convert a PyTorch tensor representing an RGB image to grayscale.
// Input:
// - input: A PyTorch tensor of the input RGB image.
// Output:
// - A PyTorch tensor of the output grayscale image.
torch::Tensor rgb_to_grayscale(torch::Tensor input) {
    // Perform CUDA and contiguity checks
    CHECK_INPUT(input);

    // Extract the height and width from the input tensor's dimensions.
    int h = input.size(1);
    int w = input.size(2);
    printf("\nh*w: %d*%d\n", h, w); // Debug print statement for dimensions.

    // Create an empty output tensor with the same dimensions as the input.
    auto output = torch::empty({h, w}, input.options());

    // Define the number of threads per block.
    int threads = 256;

    // Calculate the number of blocks needed for the conversion, ensuring
    // we have enough blocks to cover all pixels.
    // Launch the CUDA kernel with calculated dimensions.
    rgb_to_grayscale_kernel<<<cdiv(w*h, threads), threads>>>(
        input.data_ptr<unsigned char>(), output.data_ptr<unsigned char>(), w*h);

    // Check for any errors during kernel launch or execution.
    C10_CUDA_KERNEL_LAUNCH_CHECK();

    // Return the output tensor.
    return output;
}
Get the module attributes
# Print the attribute names of the module as a Pandas DataFrame
pd.DataFrame(dir(module))| 0 | |
|---|---|
| 0 | doc |
| 1 | file |
| 2 | loader |
| 3 | name |
| 4 | package |
| 5 | spec |
| 6 | rgb_to_grayscale |
We can see from the list of module attributes that the rgb_to_grayscale PyTorch function we defined is available.
Test the PyTorch Extension
Now, all that’s left is to test the custom CUDA kernel to see how it compares to the baseline Python implementation.
Prepare the image tensor
First, we must move the RGB tensor to the GPU and ensure it’s contiguous in memory.
# Convert the tensor to a contiguous format and move it to the default CUDA device
img_tensor_cuda = resized_img_tensor.contiguous().cuda()
Time the CUDA implementation
We will use the same %%time magic command to gauge the performance.
%%time
res = module.rgb_to_grayscale(img_tensor_cuda).cpu()
h,w = res.shape
h,w,h*w
CPU times: user 725 µs, sys: 26 µs, total: 751 µs
Wall time: 559 µs
h*w: 512*646
(512, 646, 330752)As a reminder, the baseline Python implementation took 6.53 seconds (6,530,000 microseconds (µs) for the same input on the CPU.
Verify the Result
Image.fromarray(res.numpy(), mode='L')
Conclusion
This tutorial covered the steps for setting up CUDA within a Python environment and using PyTorch to build a custom CUDA kernel.
If you found this topic interesting, I recommend checking out the lectures from the CUDA MODE reading group and joining its discord:
- Feel free to post questions or problems related to this tutorial in the comments below. I try to make time to address them on Thursdays and Fridays.
I’m Christian Mills, an Applied AI Consultant and Educator.
Whether I’m writing an in-depth tutorial or sharing detailed notes, my goal is the same: to bring clarity to complex topics and find practical, valuable insights.
If you need a strategic partner who brings this level of depth and systematic thinking to your AI project, I’m here to help. Let’s talk about de-risking your roadmap and building a real-world solution.
Start the conversation with my Quick AI Project Assessment or learn more about my approach.