How to Crop Images With a GPU in Unity
- Introduction
- Create a 2D Unity Project
- Create
CropScript - Create Screen GameObject
- Create ImageCropper
- Test it Out
- Conclusion
Introduction
In this post, we cover how to create a square crop of an image in Unity without using a shader. You can also adapt the approach described in this tutorial to crop other parts of images.
Create a 2D Unity Project
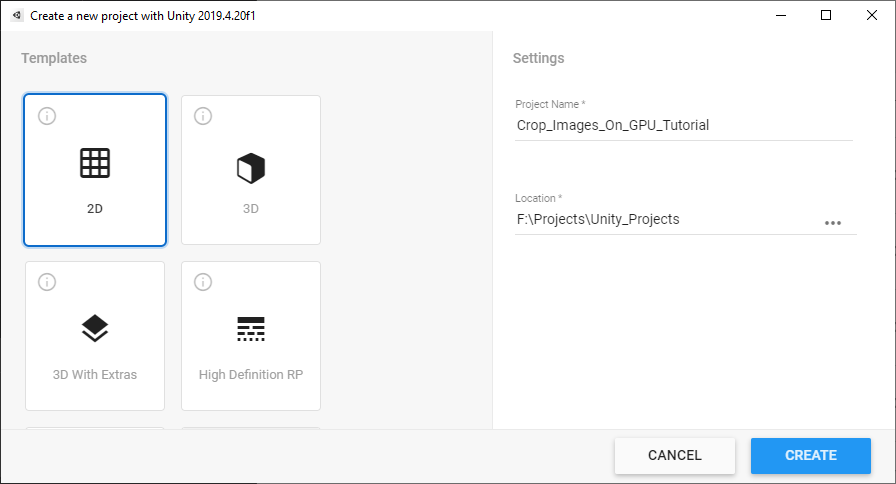
Open the Unity Hub and create a new 2D project. I’m using Unity 2019.4.20f1, but you should be fine using other versions.
Create Crop Script
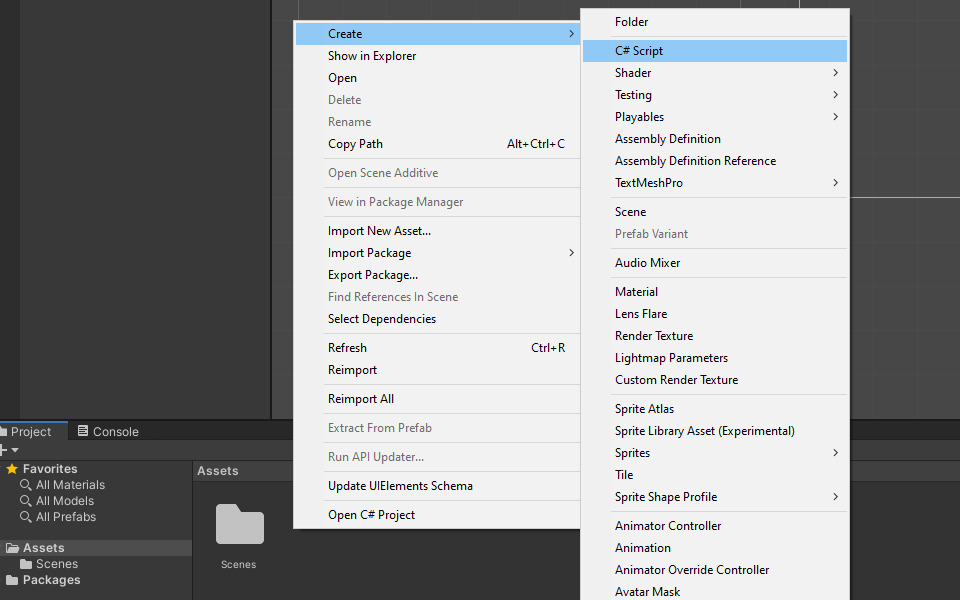
In Unity, right-click an empty space in the Assets folder and select C# Script in the Create submenu. Name the new script, Crop and open it in your code editor.
Define Variables
Create a public GameObject variable called screen. We’ll be using this screen to confirm our script is correctly cropping the test images. Add a public bool variable called cropImage as well. This will let us toggle whether to crop the image during runtime. Lastly, we’ll create a private RenderTexture called image to store a copy of the original test image.
public class Crop : MonoBehaviour
{
    [Tooltip("The screen to which the test image is attached")]
    public GameObject screen;

    [Tooltip("Toggle whether to crop the test image")]
    public bool cropImage;

    // A copy of the original test image
    private RenderTexture image;


    // Start is called before the first frame update
    void Start()
Define Start() Method
In the Start() method, we’ll store a copy the original test image in the image RenderTexture. We can do so by getting a reference to the Texture attached to the screen and using the Graphics.Blit() method. We’ll also adjust the camera so that we can see the entire image.
// Start is called before the first frame update
void Start()
{
    // Get a reference to the image texture attached to the screen
    Texture screenTexture = screen.GetComponent<MeshRenderer>().material.mainTexture;

    // Create a new RenderTexture with the same dimensions as the test image
    image = new RenderTexture(screenTexture.width, screenTexture.height, 24, RenderTextureFormat.ARGB32);
    // Copy the screenTexture to the image RenderTexture
    Graphics.Blit(screenTexture, image);

    // Get a reference to the Main Camera object
    GameObject mainCamera = GameObject.Find("Main Camera");
    // Adjust the camera so that the whole image is visible
    mainCamera.GetComponent<Camera>().orthographicSize = image.height / 2;
}
Define Update() Method
First, we need to make another copy of the original image so that we can edit it. We’ll store this copy in a temporary RenderTexture called rTex that will get released at the end of the method.
We can’t change the dimensions of a RenderTexture after it’s been created. Instead, we’ll create a cropped image by copying part of rTex to another temporary RenderTexture called tempTex that will be square. We can copy the square image to rTex after we release the current RenderTexture assigned to rTex and make a new square one.
The size of tempTex will depend on whether the original image is wider or taller. We want to use the smallest side of the original image.
We’ll determine what part of rTex we need to copy by calculating either (image.width - image.height) / 2f or (image.height - image.width) / 2f depending on whether the image is wider or taller.
We can copy part of rTex to tempTex using the Graphics.CopyTexture() method. We need to specify several parameters in order to use this method to crop images.
src: The original imagesrcElement: The source texture element, set to0- Not relevant for our use case
srcMip: The mipmap level for the imageRenderTexture, set to0- Not relevant for our use case
srcX: The X coordinate of the top left corner of the center square of the original imagesrcY: The Y coordinate of the top left corner of the center square of the original imagesrcWidth: Width of the new square imagesrcHeight: Height of the new square imagedst: An empty squareRenderTexturedstElement: The destination texture element, set to0- Not relevant for our use case
dstMip: The mipmap level for destination texture, set to0- Not relevant for our use case
dstX: The X coordinate of the top left corner of the new square imagedstY: The Y coordinate of the top left corner of the new square image
After we copy tempTex back to rTex we’ll update the Texture for the screen with the new square image and adjust the shape of the screen to fit the new image.
// Update is called once per frame
void Update()
{
    // Allocate a temporary RenderTexture with the original image dimensions
    RenderTexture rTex = RenderTexture.GetTemporary(image.width, image.height, 24, image.format);
    // Copy the original image
    Graphics.Blit(image, rTex);

    if (cropImage)
    {
        // Stores the size of the new square image
        int size;
        // Stores the coordinates in the original image to start copying from
        int[] coords;
        // Temporarily tores the new square image
        RenderTexture tempTex;

        if (image.width > image.height)
        {
            // Set the dimensions for the new square image
            size = image.height;
            // Set the coordinates in the original image to start copying from
            coords = new int[] { (int)((image.width - image.height) / 2f), 0 };
            // Allocate a temporary RenderTexture
            tempTex = RenderTexture.GetTemporary(size, size, 24, image.format);
        }
        else
        {
            // Set the dimensions for the new square image
            size = image.width;
            // Set the coordinates in the original image to start copying from
            coords = new int[] { 0, (int)((image.height - image.width) / 2f) };
            // Allocate a temporary RenderTexture
            tempTex = RenderTexture.GetTemporary(size, size, 24, image.format);
        }

        // Copy the pixel data from the original image to the new square image
        Graphics.CopyTexture(image, 0, 0, coords[0], coords[1], size, size, tempTex, 0, 0, 0, 0);

        // Free the resources allocated for the Temporary RenderTexture
        RenderTexture.ReleaseTemporary(rTex);
        // Allocate a temporary RenderTexture with the new dimensions
        rTex = RenderTexture.GetTemporary(size, size, 24, image.format);
        // Copy the square image
        Graphics.Blit(tempTex, rTex);

        // Free the resources allocated for the Temporary RenderTexture
        RenderTexture.ReleaseTemporary(tempTex);
    }

    // Apply the new RenderTexture
    screen.GetComponent<MeshRenderer>().material.SetTexture("_MainTex", rTex);
    // Adjust the screen dimensions to fit the new RenderTexture
    screen.transform.localScale = new Vector3(rTex.width, rTex.height, screen.transform.localScale.z);

    // Free the resources allocated for the Temporary RenderTexture
    RenderTexture.ReleaseTemporary(rTex);

}
Create Screen GameObject
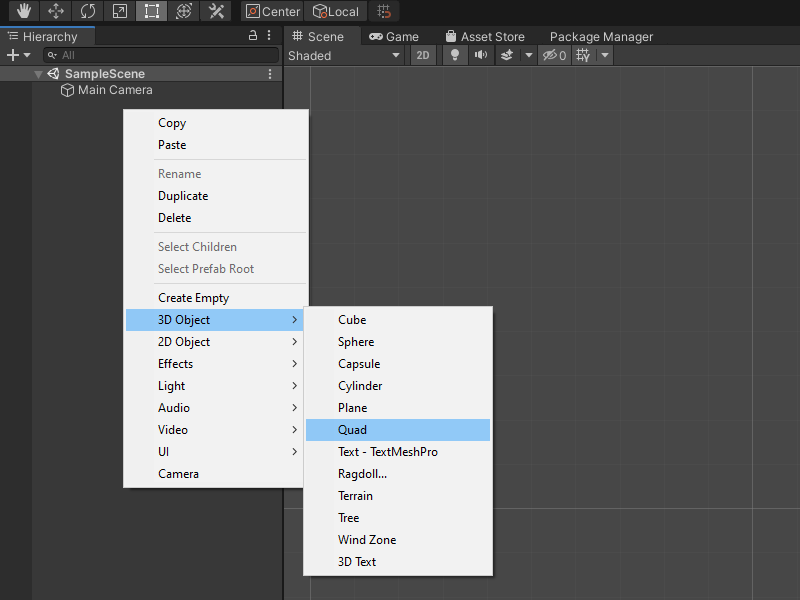
Back in Unity, right-click an empty space in the Hierarchy tab and select Quad from the 3D Object submenu. Name the new object Screen. The size will be updated automatically by the Crop.cs script.
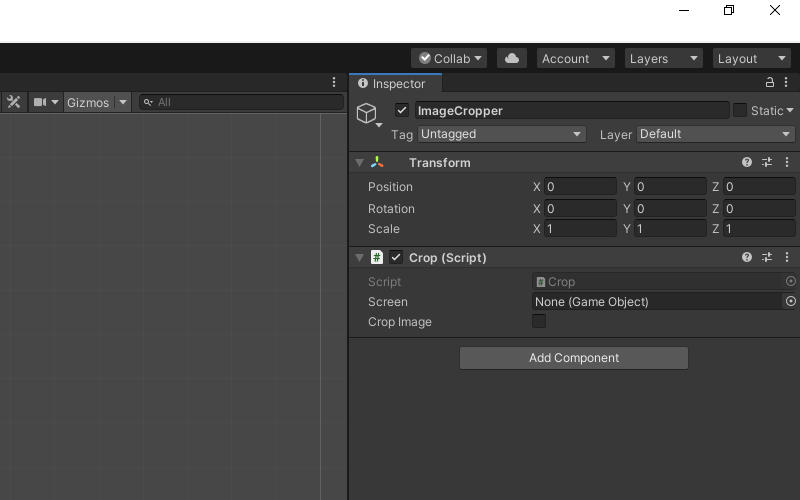
Create ImageCropper
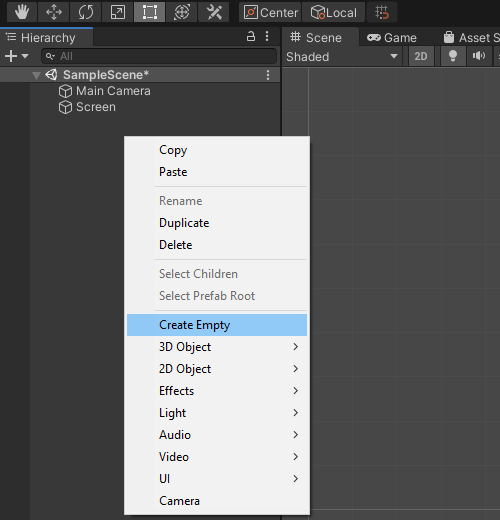
Right-click an empty space in the Hierarchy tab and select Create Empty from the pop-up menu. Name the empty object ImageCropper
With the ImageCropper selected drag and drop the Crop.cs script into the Inspector tab.
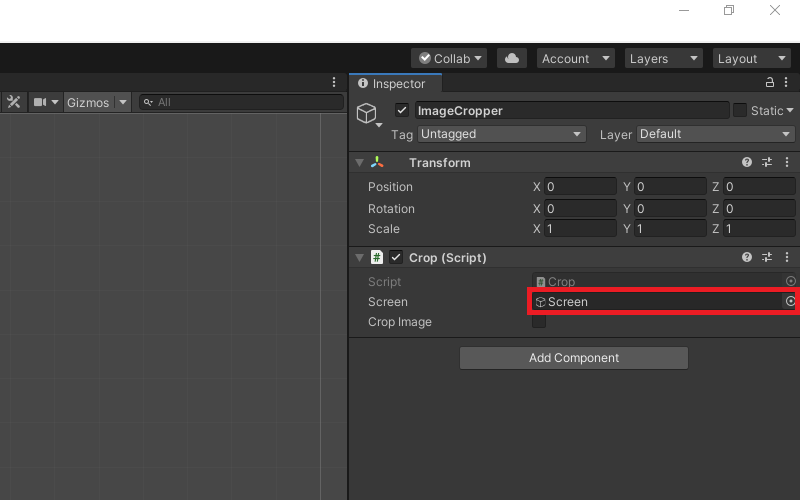
Drag and drop the Screen object from the Hierarchy tab onto the Screen parameter in the Inspector tab.
Test it Out
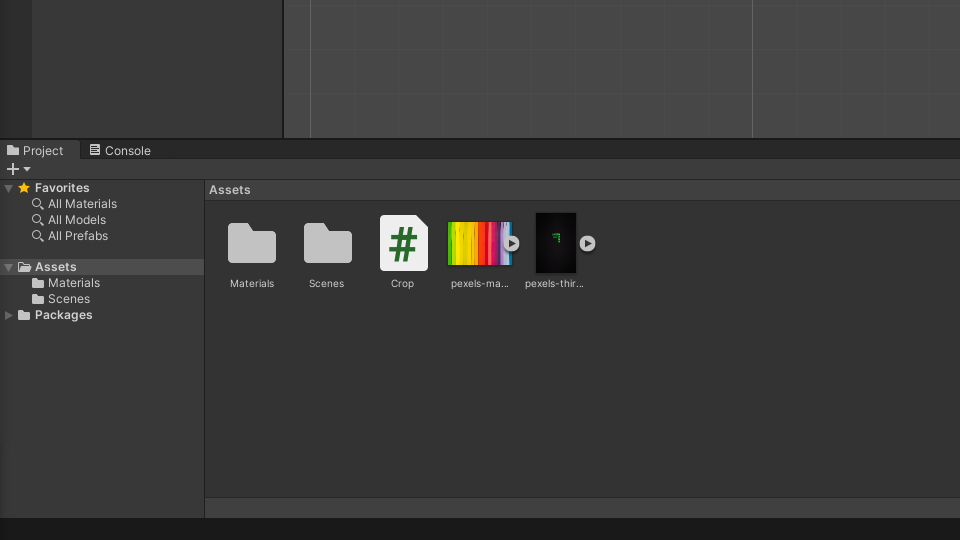
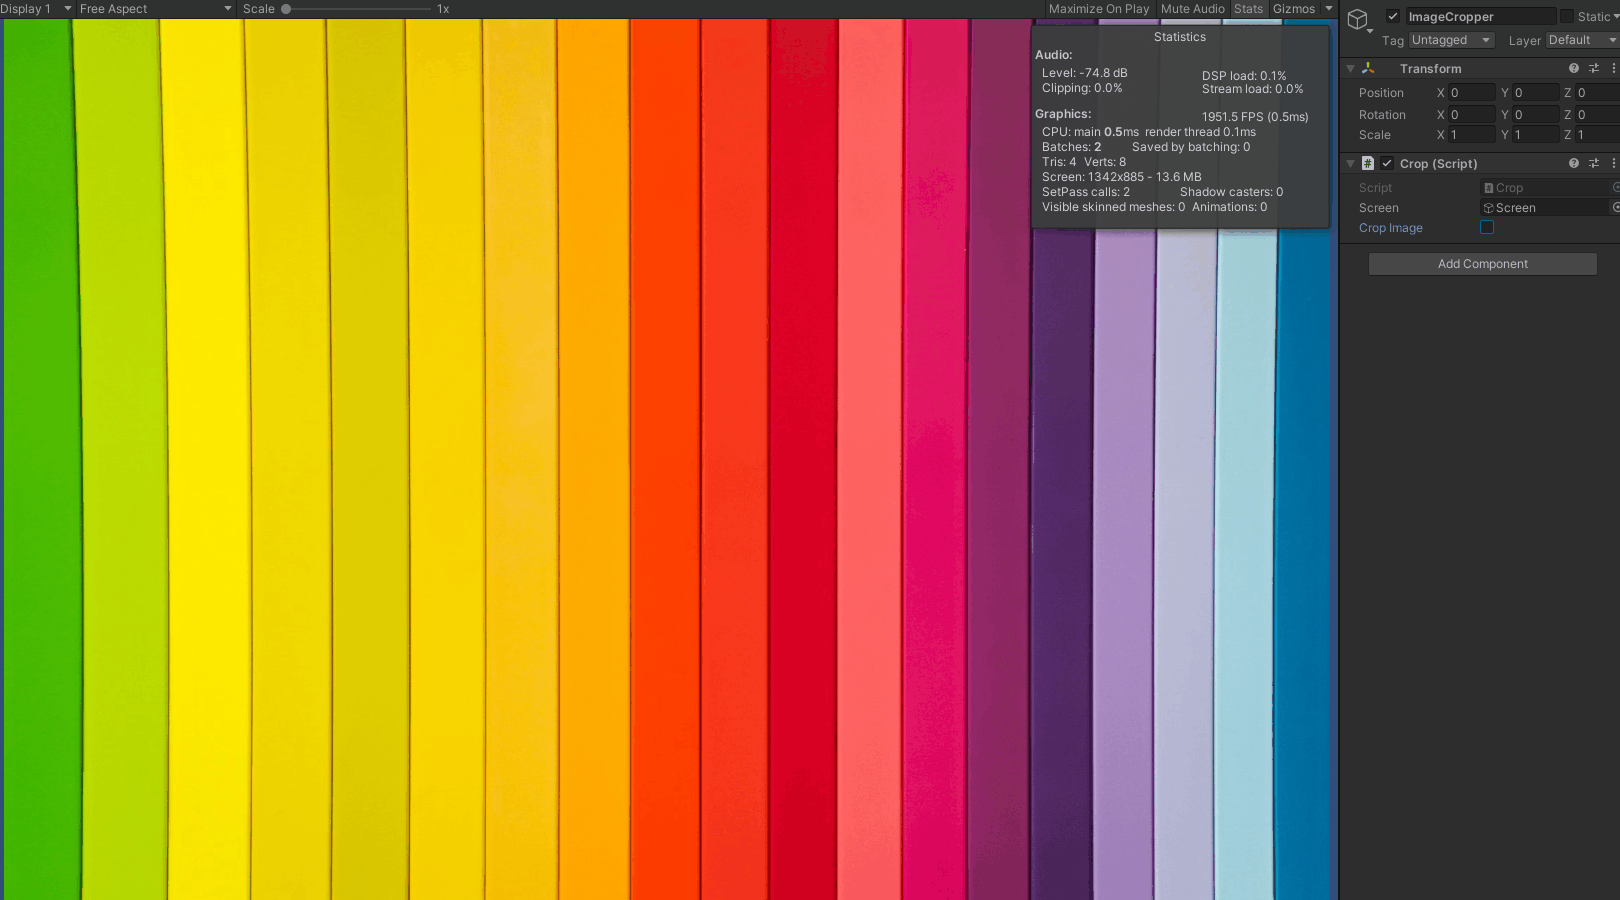
We’ll need some test images to try out the ImageCropper. You can use your own or download the ones I used for this tutorial.
Drag and drop the test images into the Assets folder. Select one of the images and drag it onto the Screen in the Scene.
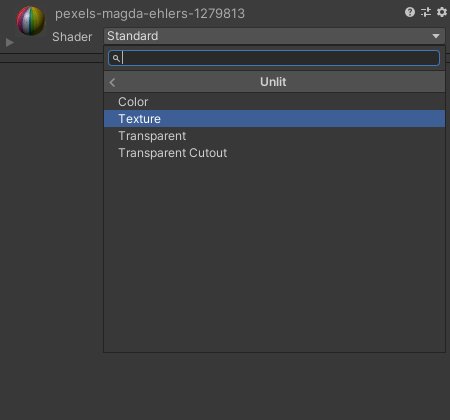
Next, we need to set our Screen to use an Unlit shader. Otherwise it will be a bit dim. With the Screen object selected, open the Shader drop-down menu in the Inspector tab and select Unlit.
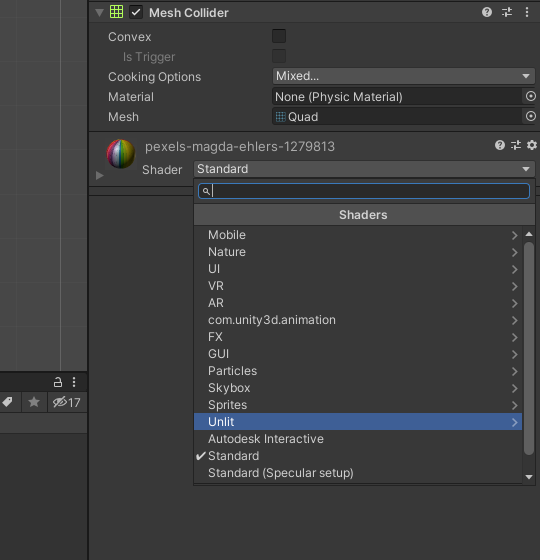
Select Texture from the Unlit submenu.
Now we can click the Play button and toggle the Crop Image checkbox to confirm our script is working properly. If you check the performance stats, you should see that there is basically no performance hit from cropping the image.
Conclusion
That is one method to efficiently crop images on the GPU in Unity. As mentioned earlier, this method can be adapted to crop different parts of the image. You can do so by changing the values for the Graphics.CopyTexture() method to adjust what part of the source image gets copied and where in the target image it gets copied to.
Project Resources: GitHub Repository
I’m Christian Mills, an Applied AI Consultant and Educator.
Whether I’m writing an in-depth tutorial or sharing detailed notes, my goal is the same: to bring clarity to complex topics and find practical, valuable insights.
If you need a strategic partner who brings this level of depth and systematic thinking to your AI project, I’m here to help. Let’s talk about de-risking your roadmap and building a real-world solution.
Start the conversation with my Quick AI Project Assessment or learn more about my approach.